How to Add SEO Tags on HubSpot CMS Pages?
Learn how to add SEO tags on HubSpot CMS pages. This activity will ensure your website pages rank at higher positions and bring in organic traffic.
Our HubSpot Products
OUR COMPANY

Hey Marketer! Get ready to learn techniques which will help you speed up HubSpot website. It's your time to contribute to the performance score of your brand website.
Search Engines (Google) have driven this trend behind minimising the code behind a website to such an extent that the page loads faster and works perfectly on mobile devices.
As you've (ok, your boss!) chosen HubSpot CMS to manage the back-end of your website, this guide will share all the quick DIY tricks to speed up your HubSpot website.
This guide will focus on performance optimisations methods which non-developers can easily follow. So, you don't have to be too nerdy in order to pull this off.
Performance based ranking system of Google is not new. It has been around for past couple of years. All Google wants is the websites to load faster and to work perfectly on mobile devices.
I'll point out the top benefits of having a faster and responsive website.
Internet users are always in hurry and they prefer doing business with websites which works perfectly on their mobile devices and are faster to load. So, the first benefit is that your website will deliver better UX.
Google awards faster and responsive webpages by moving them to a better ranking position. Performance and responsiveness are not the only ranking factor but they are among the top one. So, the second benefit is that your webpages will rank on top positions for those competitive keywords.
Improved UX and top SERP ranking will both help your webpage to be remembered easily by the visitors/users. It will clearly benefit your business's branding efforts.
These three reasons are enough for any business owner to work upon performance part of their website.
Let's begin with the non-developer techniques to speed up HubSpot website.
Out of all the available tools to measure performance of a webpage, I prefer GTMetrix simply because of the amount of data it shares. It is powered by Google's Lighthouse tool.
Step 1: Visit GTMetrix tool and put in your webpage to start the test. We usually start with homepage but you can repeat the process with all (or at least, important ones) other pages of your website.
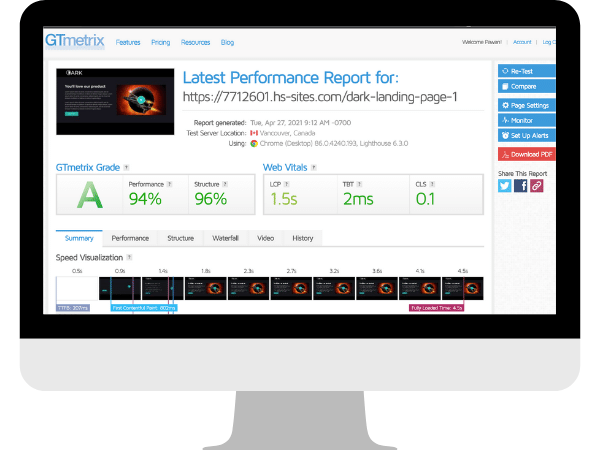
Step 2: Now click on the Waterfall tab and click on the Size column twice to re-arrange the page elements. This is where you'll see each element with its size. This is where you need to look for each heavy size element which can be optimised without affecting the functionality of the webpage. Once you've identified and worked on those heavy elements which needs optimisation.
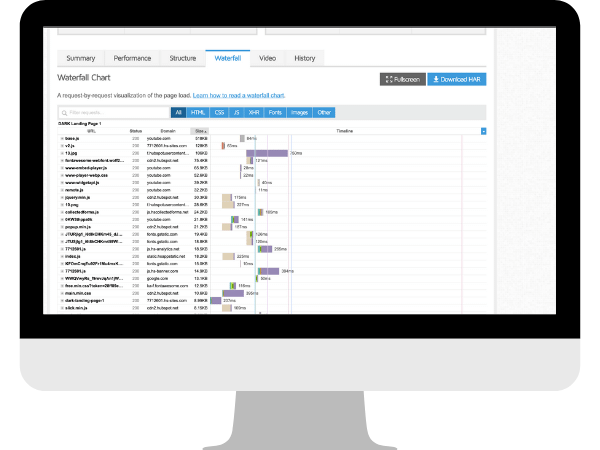
Your webpage will load faster and GTMetrix will award your webpage with a better score.
In 90% of the cases, images are the primary cause for the poor performance but don't worry, they are easy to fix and doesn't require a developer.
Image dimensions: Luckily, there is a fix pattern for you to follow which is mentioned below.
| Image Size | Maximum Width |
| Full-screen image | 1920 pixels |
| Half-screen image | 700-800 pixels |
| Small size image | 300 pixels |
These are the best practice for image dimensions.
Adjusting the dimension of an image is simple and doesn't require any additional software.

In Windows, you can simply open the image in Paint and click on the Resize icon. Then click on Pixels radio button and now simply type in the Width as per the table above in the Horizontal section. Click Ok button to finish this task.

In Mac, open the image in Preview tool, then click on Pencil icon. Now click on Adjust icon and enter the width as per the table above and click Ok button. Press Command + S to save.
Once the dimensions part is over. The second step involves image format.
Image formats: Luckily, there is a fix pattern here as well which you can simply follow as per the table below.
| Image Purpose | Best Format |
| Transparent image | .png |
| General image | .webp/.jpeg |
Unless you need the transparency effect, we recommend uploading all the images in .webp/jpeg format only.
The process to change format of an image is fairly simple and you don't have to install any software for it. Neither you need to access an online tool.

In Windows, you can simply open the image in Paint and click on the File menu and then select Save As option. Now from the Save as type column, select the JPEG option and click on Save button.

In Mac, open the image in Preview tool, then click on File menu and then on Export option. Now select JPEG from the Format column and then hit the Save button to finish the export task.
Compression: This is the third and final step which involves compression. By reducing the dimension and choosing the .jpeg format, you've already reduced the image file size to a great extent. But, you can still go extra mile and compress the size further using a lossless compression technique.
Lossless compression will reduce the file size further without reducing the image quality.
The process of compression is fairly simple. Luckily, there is a built-in compression mechanism for all the images within HubSpot CMS.
Still, I'll recommend you to learn this simple technique. You can also follow it even in the case of HubSpot CMS.
Step 1: Open the TinyPNG/TinyJPG website.
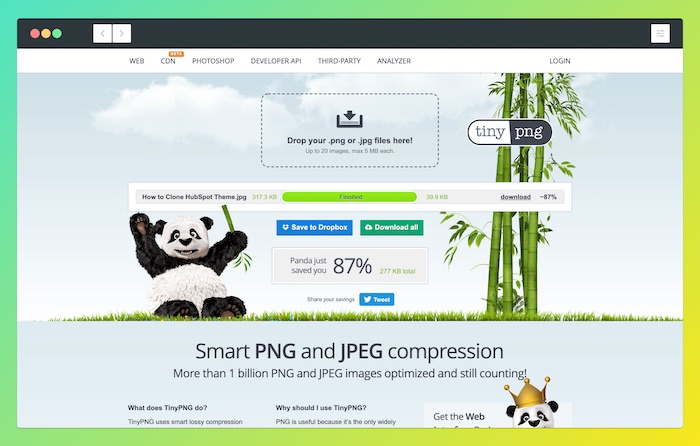
Step 2: Drag and drop the image you wish to compress in the mentioned area and wait for the magic to happen automatically.
Step 3: Once compression is over, you'll have option to save the compressed image on your system.
Now this is the final version of image file, you should be uploading and using on your webpage for maximum performance score.
It's a smart technique of loading images on user's scroll rather than loading the complete set of images on a webpage in one go.

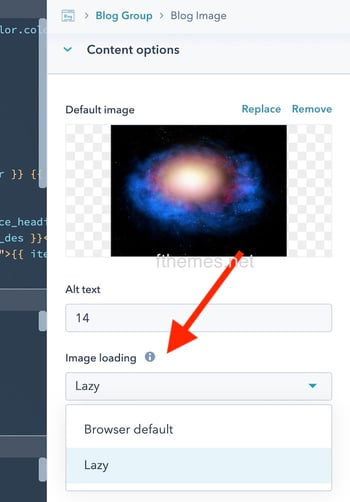
Once Lazy Load is enabled, the browser loads up images used in the first fold only. It then loads rest of the images in different folds when user starts scrolling.
One clear benefit is that the initial page loads faster, thus, improving user experience and performance score. Second benefit is that you didn't do anything crazy to make this performance tweak and it isn't going to cost you anything.
Implementing Lazy Load is not that hard so you don't have to call a developer to configure it in your HubSpot CMS powered website.
This is where a premium HubSpot theme plays a vital role. Our DARK Business and K2 Multipurpose premium themes have Lazy Load feature pre-built for images, ensuring our clients score maximum in performance tests.
For other themes, you've to follow the process added below. Do note that it's important to have a HubSpot developer around, just in case you push the wrong buttons.
You can easily embed YouTube videos in a webpage or from any other hosting platform of your choice. But to get maximum performance score, it's important for you to upload videos to HubSpot platform and embed the same on your webpages.
Embedding YouTube videos will slow down the page as on every page load, the necessary files to play that video is being fetched and loaded on your webpage via third-party server. It increases the page size and also increases the number of requests. Both can affect the performance badly!
Solution: use HubSpot videos.
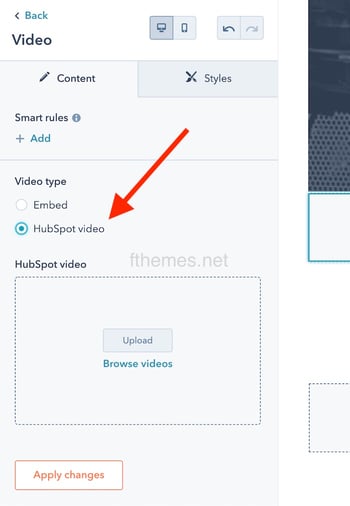
Luckily the solution in case of HubSpot CMS is very simple. Both CMS Hub Professional and Enterprise plan comes with up to video hosting feature.
You can simply upload videos to the Files section and then use them on any page. You can learn all about it over here.
Setting up redirections in HubSpot is easy but you need to avoid unnecessary redirects.
This is because every redirect action puts additional load on the web browser as it has to try rendering the page and also make HTTP request-response round trips.
Unless it's too important for you to put a redirection, I would recommend for you to avoid them. You also need to avoid putting multiple redirection chain, as it will waste time and web resources.
No one likes to read a long website page, unless it's a detailed blogpost (like this one). Also, every single website or landing page should focus on a single product/service and must have a single Call to Action.

A shorter and to-the-point page not only saves visitor's time but it also has lesser elements to render. Thus, its performance is always going to be better than a longer webpage.
Unless you're writing a long blogpost, an ideal webpage (product page or landing page) shouldn't be stretched beyond 5-7 folds. Keeping the pages shorter will also force your copywriter to quickly convey the product/service features.
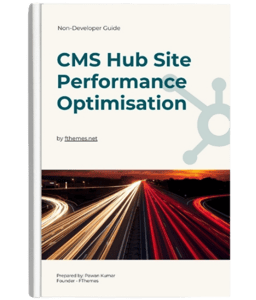
Want to save this complete guide in PDF format and share with your colleagues? I've already got that covered all these techniques to speed up HubSpot website in this QuickBook over here. Ebooks are boring, so I coined this term, QuickBook for my quick to learn ebooks.
There are many elements which needs proper care while developing the base of a website. In our case, that base is a HubSpot theme. You can use our DARK free HubSpot theme which will give you a glimpse of our work.
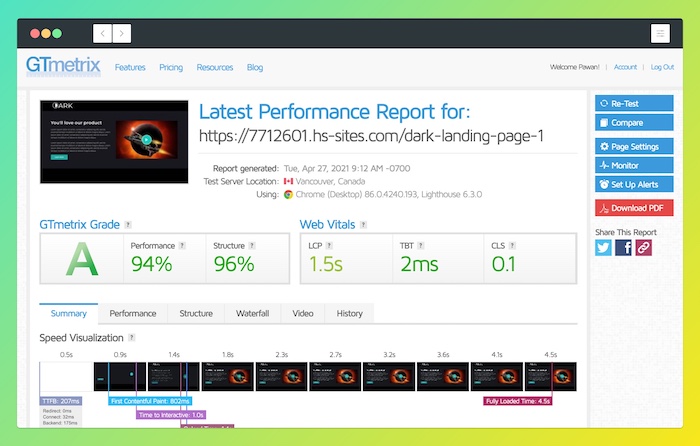
As you can see in the screenshot above, webpage built using our paid themes are as fast as possible, achieving over 90% score in GTMetrix test.
To get the complete set of features and functionalities, I recommend upgrading to our HubSpot approved premium theme. The themes also takes care of the fancy new core web vitals.
That's it from my side. I will be happy to answer all your questions related to speed up HubSpot website or anything related to HubSpot CMS in the comment section below or you can chat with our team. If all these tasks sounds too much for you or your team resources are completely occupied, you can check how our managed HubSpot CMS service can help.
TAGS
HubSpot CMSLearn how to add SEO tags on HubSpot CMS pages. This activity will ensure your website pages rank at higher positions and bring in organic traffic.
You'll quickly learn how to quickly enable SSL on HubSpot CMS website. All HubSpot CMS plans and Marketing plans comes with free SSL and will only...
Quickly import blogposts in HubSpot CMS (via .csv file) from your existing blog. The process will require your undivided attention.
Leave A Reply