Shopify is well known for its functionality. It is the platform for eCommerce stores where merchants or business owners can open and operate their online store and sell branded products with the help of this platform. This platform helps offline store owners to step into the digital world and to stand out in the market.
In this blog, we are going to understand the valid process of how to close a Shopify store or how to delete a Shopify account in simple steps.
Note: Please note that as company policy has been changed on December 15, 2021, the account pause option is removed from the store settings and it will get affected as of December 15, 2021.
So you can't pause your Shopify store. "Delete" is the only option active from now on.
Before deleting the store, you must check the following list of dos and don'ts with your store.
- Your reason may be store-related or business revenue-related or personal. Whatever your reason may be, understand that once you delete your account, there is no going back to your previous store.
- You can create a new store with the same name as the previous one but you can't use the same URL as the one you used for your previous store.
- For security reasons, Shopify won’t delete your store by itself. You have to do it manually.
- Make sure that before deleting your store you must export all your data in a CSV file. This file contains your store details, product details, gift card details (if any), and billing details.
- Make sure that you turn off your Auto-Renewal settings before deleting your account to avoid any extra charges.
Steps to Delete Shopify account
By following the below steps you can delete your Shopify store easily.
Step 1: Login to Shopify
At first, login to your Shopify account and after successful login, you will get redirected to your store dashboard.
On your left-hand side, you will get a side menu just like this.

From this menu, select Settings options and you will get redirected to the Store Settings page.
Step 2: Change Store settings
In the Store Settings page, you will get another side menu bar just like the one in the below image.
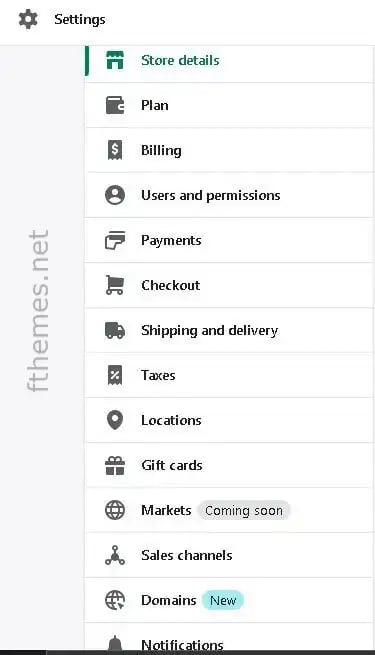
From this menu bar, select the Plan option and a new mini window will be displayed just like the one below.
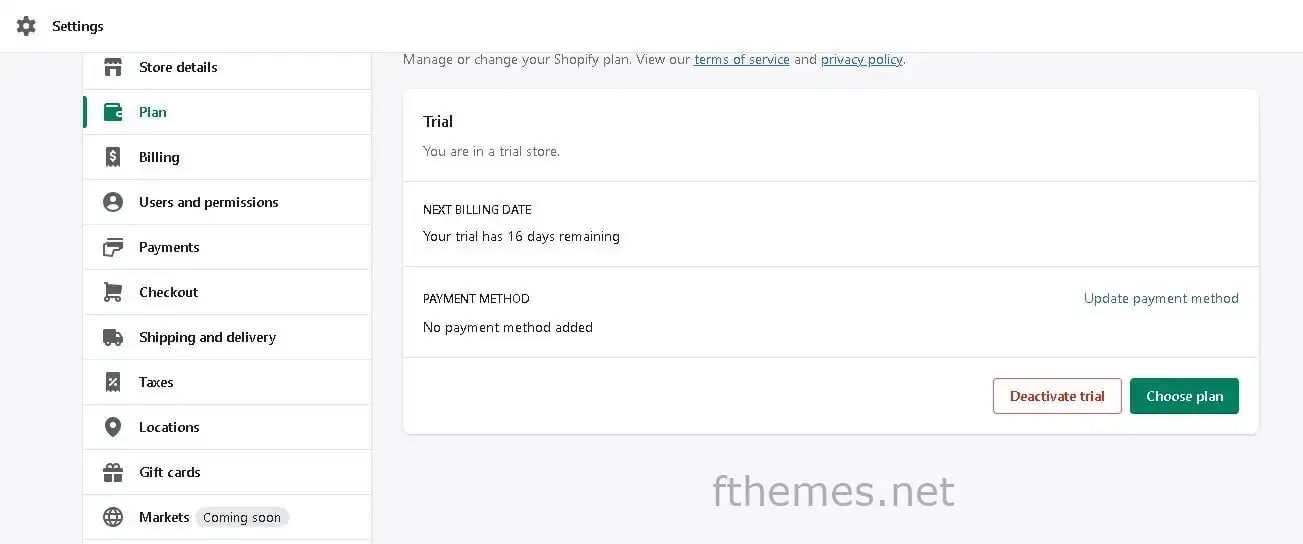
As this is just a trial account, it’s showing a label on the button as “Deactivate trial”. You will get a button labeled as “Deactivate store”.
Step 3: Start deactivation process
Once you click on that Deactivate trial button or Deactivate button, the process of delegation of accounts will get started with this popup. Here Shopify will ask you some questions and will suggest starting a new store instead of deleting the previous one.
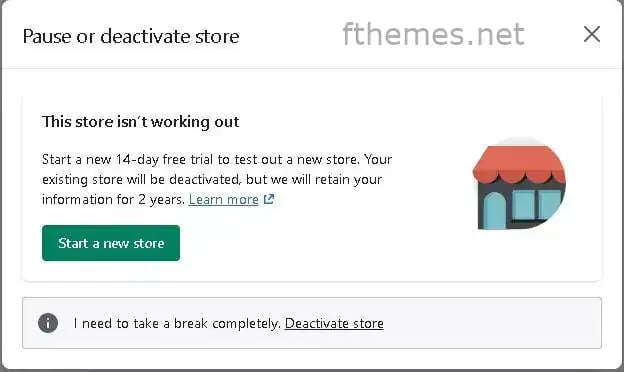
Here as shown in the image above, click on Deactivate store link button.
Step 4: Valid reason
Shopify will make every possible way to stop you from deleting the store. In this stopping process, they will offer you some help via FAQs or contact forms.
They also provide detailed guidelines for what steps you should take before deactivating your store to keep your data with you.
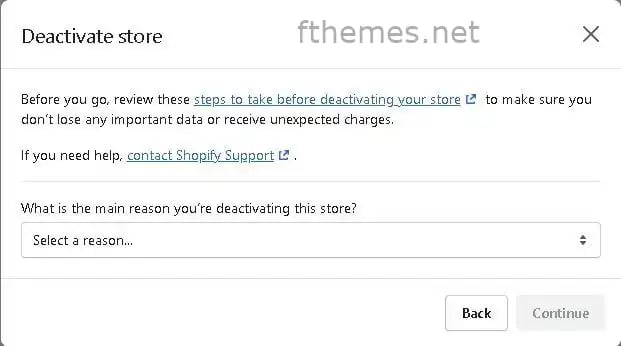
As you have noticed in the above image, there is a drop-down for selecting the reason behind your decision.
Step 5: Reason selection
Once you select this drop-down, there are plenty of primary main reasons that every store admin have faced which will show up as in the below image
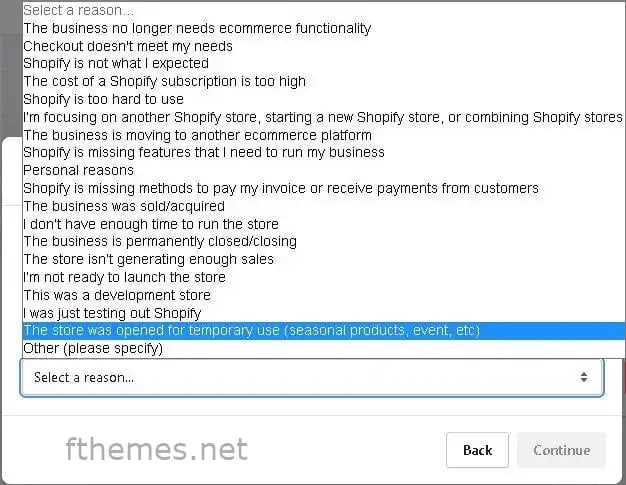
You have to select one from this list. If you select Other (please specify) from the given list instead of remaining all the reasons, then you will need to provide the reason for making this decision or what problem you are facing while using the Shopify store.
Step 6: Continue
Here I am selecting “I was just testing out Shopify” as the main reason to delete my Shopify store.
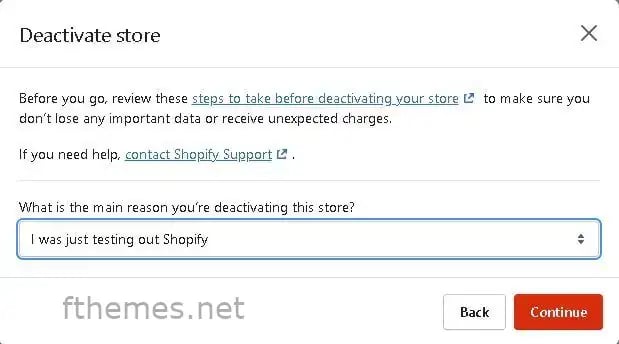
After selecting the reason the Continue button gets enabled for further procedure.
Step 7: The last step
After clicking on the Continue button, it will ask you for your login credentials again in case it’s you or another person who is trying to delete your account knowingly or unknowingly.
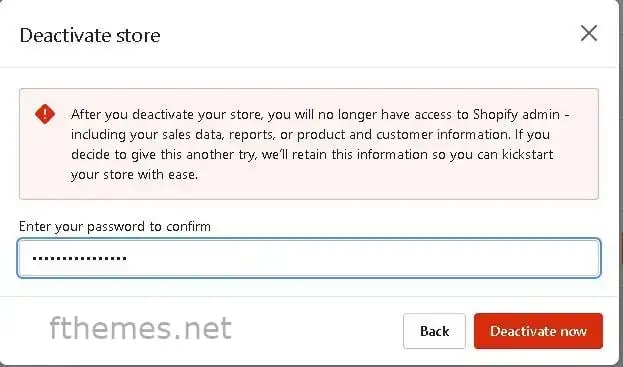
After entering the valid credentials, the Deactivate now button will get enabled and you can deactivate the store. Once you click on the Deactivate button, the process finishes here, it will logout of your account and will show a page just like the image below.

You will get redirected to the Confirmation page that the process is completed and your Store is deactivated or deleted. You will get an email confirmation of the completion of the deletion process on your registered email address as “{your-store-name} is closed.”
But it’s not the ending here. If you change your mind and you want to open your store with the same name and same data with the same store URL, you can contact the official Shopify help center for the procedure within 2 years from the date of your store deactivation.
Conclusion
Shopify is well known for its eCommerce platform providing an online store facility for the last 10 years. Deleting a Shopify account is also part of the process. Here we have learned how to delete your store from Shopify in minimum but detailed steps.
So if you miss any step or get stuck, feel free to reread this blog. If the problem doesn’t get resolved, feel free to let us know in the comments section below and we will figure out the solution for your problem as soon as possible.
You can also reach out to us for troubleshooting any particular issue you’re facing.
Talk soon!

Leave A Reply