Google has replaced the well-known Universal Analytics tracking property with Google Analytics 4 (a.k.a. GA4) which is a combination of web + app based tracking properties. In this quick tutorial, I'll share exact tutorial to configure Google Analytics GA4 on HubSpot website.
\The UA was only functional for tracking website visitors while the new GA4 is by default ready to track website and mobile application visitors. This transition won't impact majority of Google Analytics users but will do wonders for those who were looking for a simplified solution to track both web and app interactions.
Also check: Free download HubSpot testimonial module
Advantages of Using GA4
The web technologies needs to keep on updating to stay relevant in the ever changing web. The UA version of Google Analytics was long due for an update. The brand new GA4 comes with many advantages over the earlier UA version.
- It pre-configures common events which were earlier required a separate setup.
- The new dashboard takes some time to get going but it showcases more actionable insights than just plain data.
- The integration with other Google tools is now built-in which saves configuration time for the marketers.
- It is much easier to create audiences for Google Ads.
- Easy to comply with privacy laws in different regions.
The exact advantages of GA4 can easily go beyond the scope of this tutorial. In case you want to learn further, this is the best reference I'd recommend.
Configure Google Analytics GA4 on HubSpot Website
There are two ways to configure Google Analytics GA4 on the HubSpot website and blog.
- Using tracking code directly
- Implementing the same via Google Tag Manager
In this blog post, I'll share the quick steps to setup Google Analytics GA4 tracking code on HubSpot website. The tutorial to implement the same via Google Tag Manager will be covered in a separate blog post.
Let's begin with the GA4 HubSpot setup.
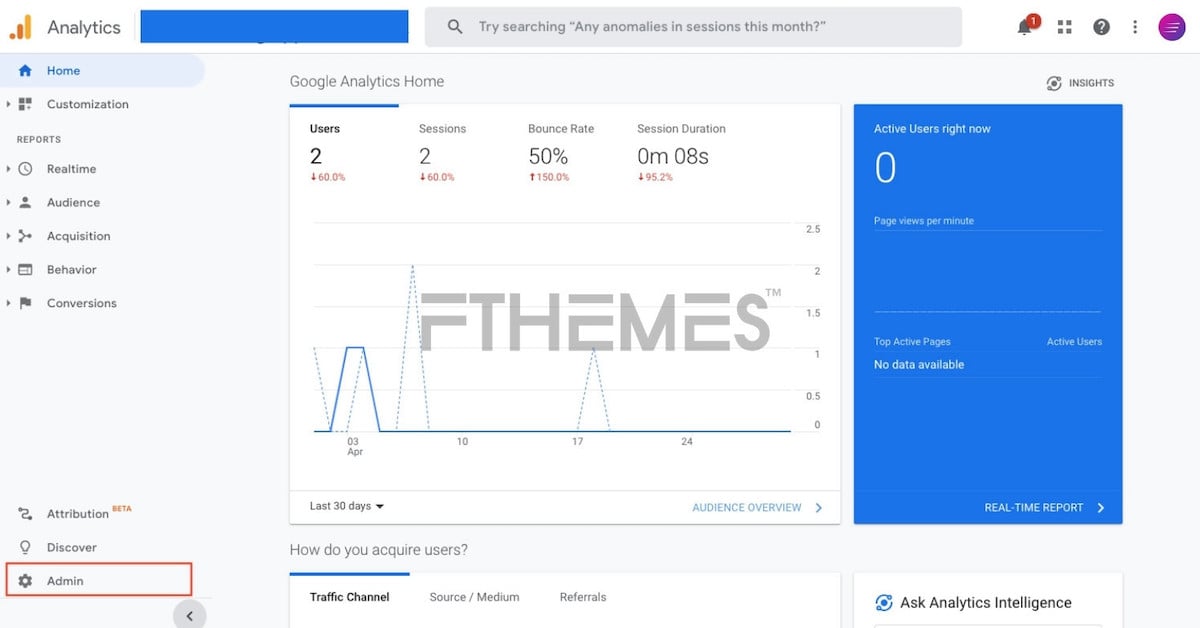
Step 1: Log in to Google Analytics using and click on “Admin” in the lower right corner of the page.
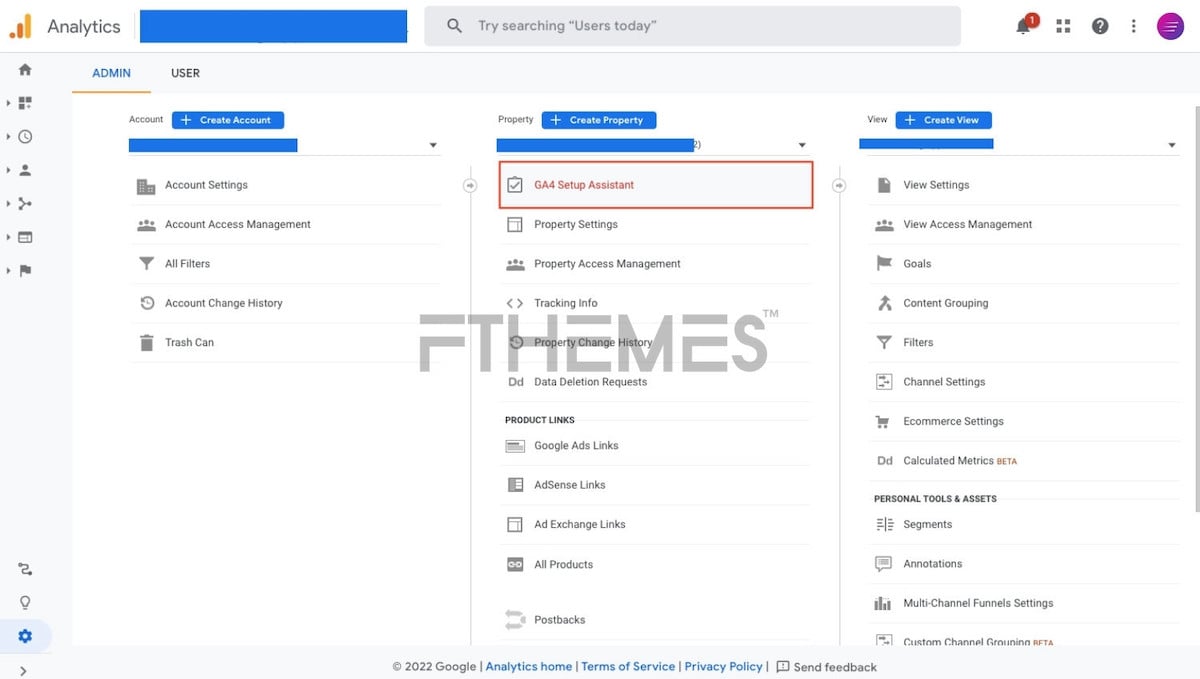
Step 2: Select the appropriate Account and Property, then click ‘GA4 Setup Assistant’ in the middle column labelled ‘Property’.
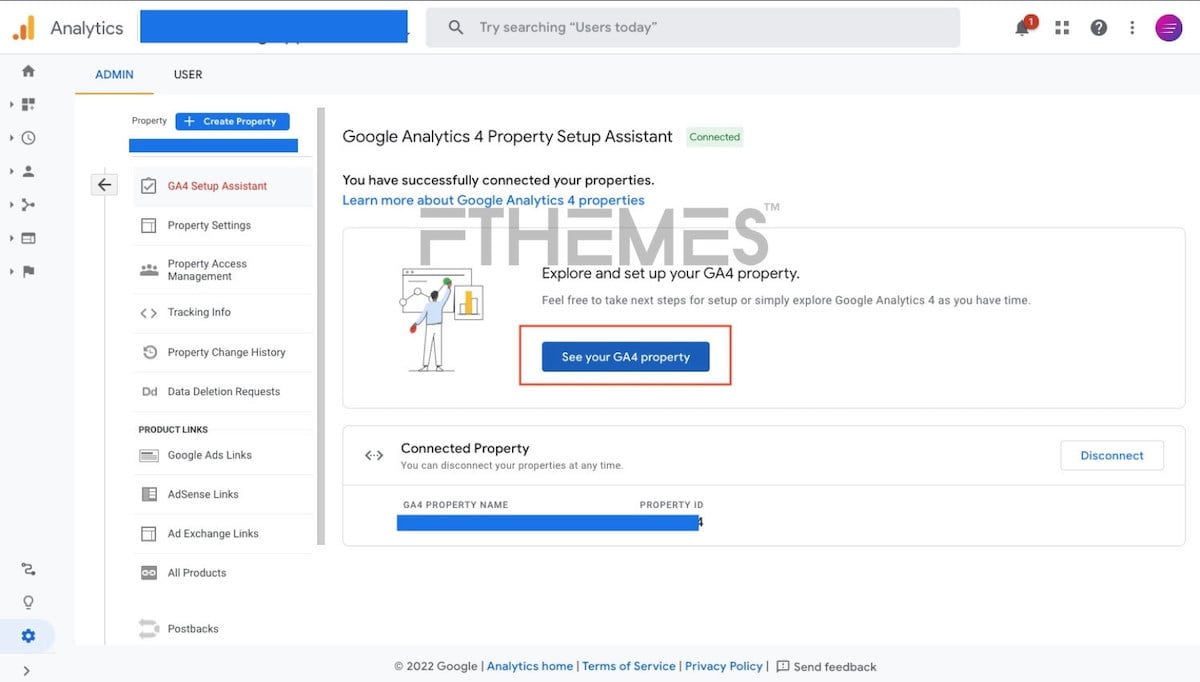
Step 3: Click on “Get Started” then click “Create property” then “See your GA4 property.”
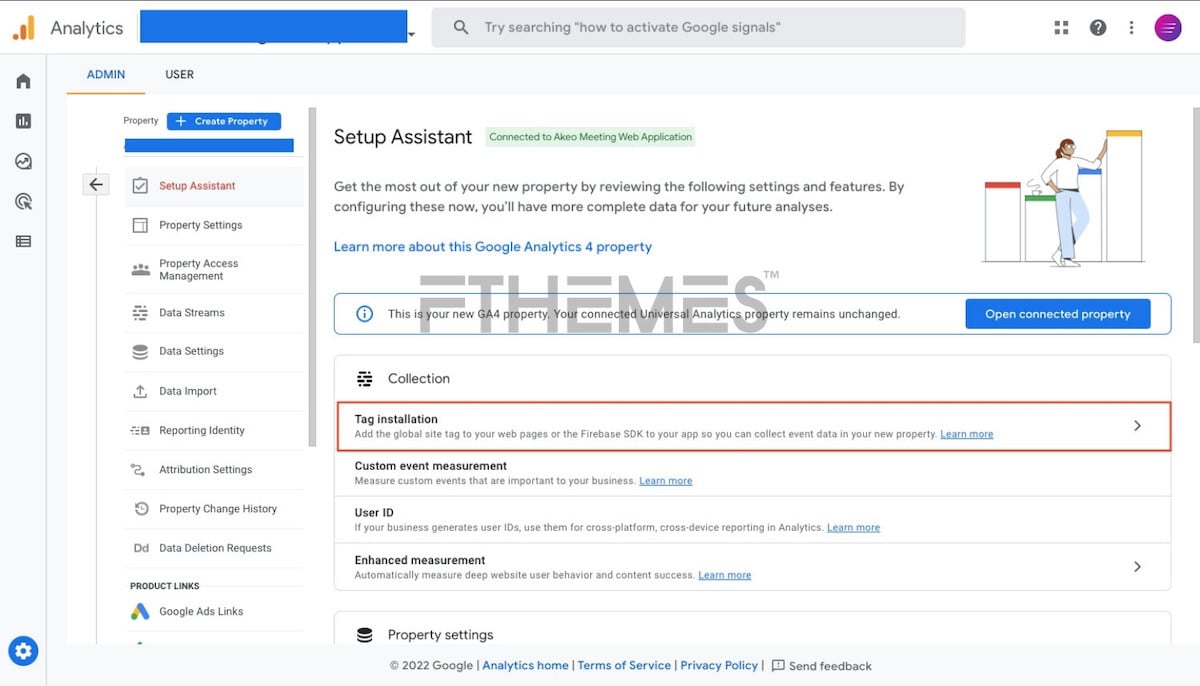
Step 4: Under “Collection” select “Tag installation” then select Web and click on the property name under “Data Streams.”
Step 5: Select “Global site tag” and copy the GA4 script.
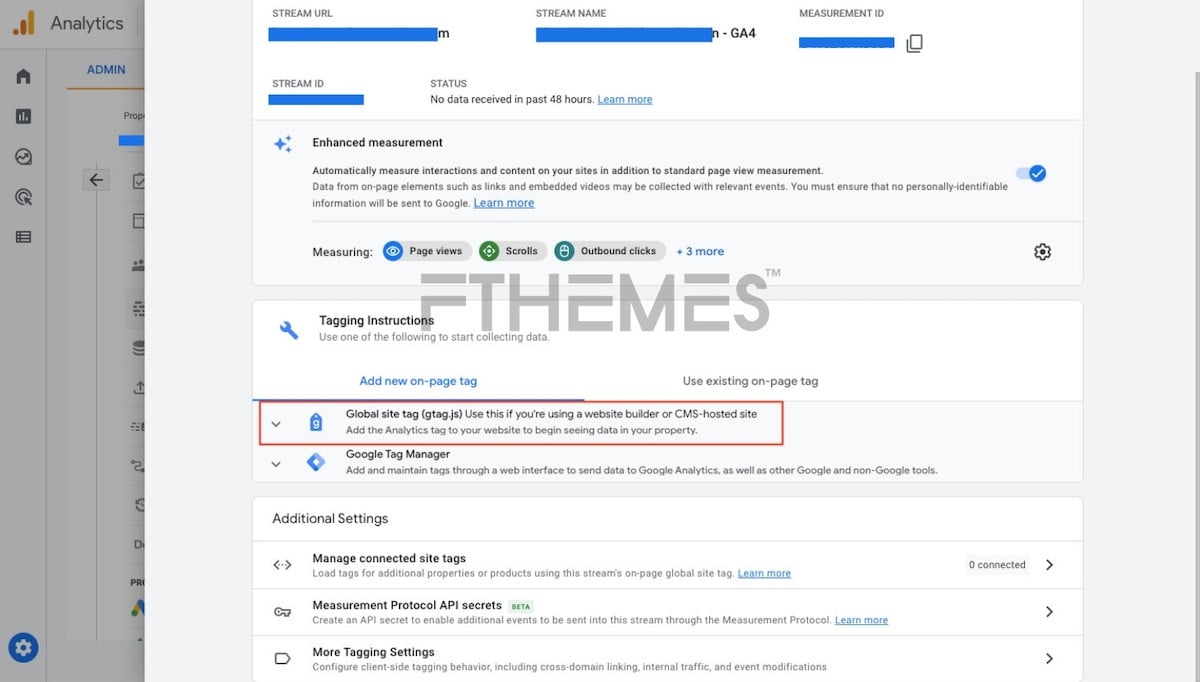
Step 6: Log into your HubSpot account and click on the Setting icon.
Step 7: Select “Pages” under Website on the Right-hand side menu.
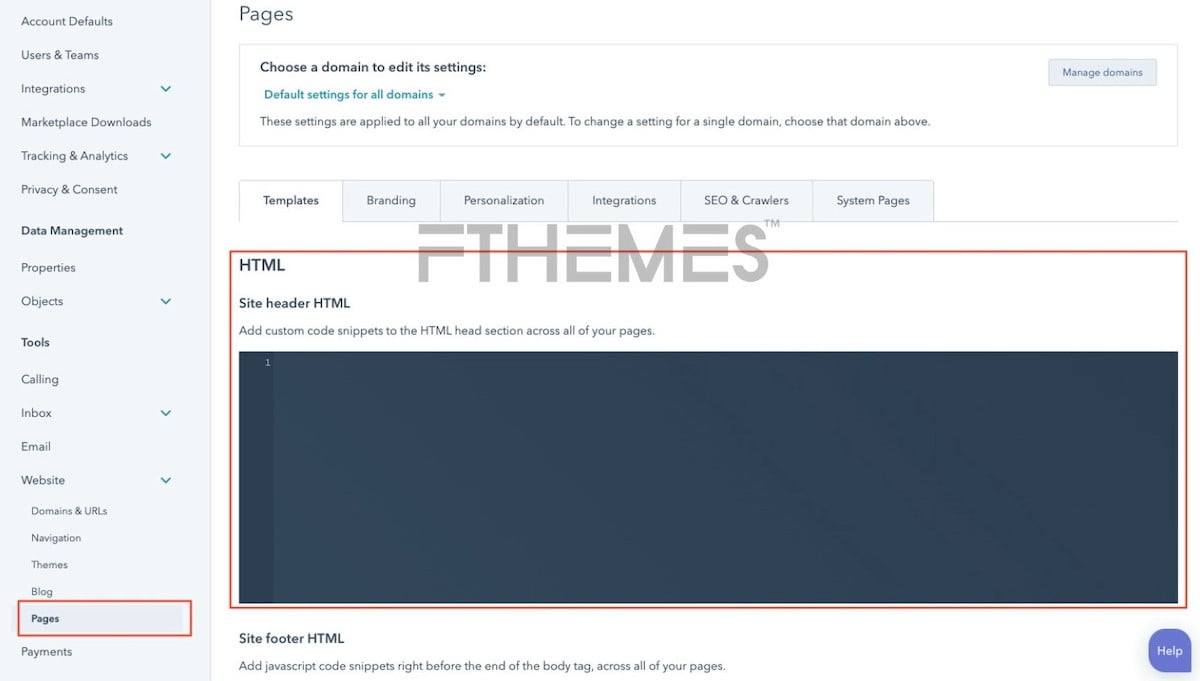
Step 8: Paste the GA4 code in the “Site header HTML” input box then save the page.
That's it! If you face any issues, reach out to me in the comment section.
You can reach out for any kind of assistant related to HubSpot website. Our team can help you with CMS Hub management, HubSpot development and even with the complicated HubSpot migration process.
Talk soon 🖖

Leave A Reply