How to Change Shopify Store Name
This blog provides a step-by-step guideline to help you change the store name of your Shopify website correctly and easily.
Our HubSpot Products
OUR COMPANY
Shopify is an eCommerce platform that gives the ability to the business owners to set up their business online and sell their products locally and even in international markets. This is an all-in-one platform where you can build and set up your online store, do marketing about your product, manage sales, etc.
Here’s a simple step-by-step guide to adding a product to Shopify, from clicking “Add a new product” in your Admin menu, to uploading and releasing the product to your storefront. Clicking on the “Add a new product” button will take you through the steps as described below.
In this article, you will learn how to add a product to your Shopify store. So let's get started.
#Step 1: The first and the most important step is to log in to your store’s Admin Dashboard.

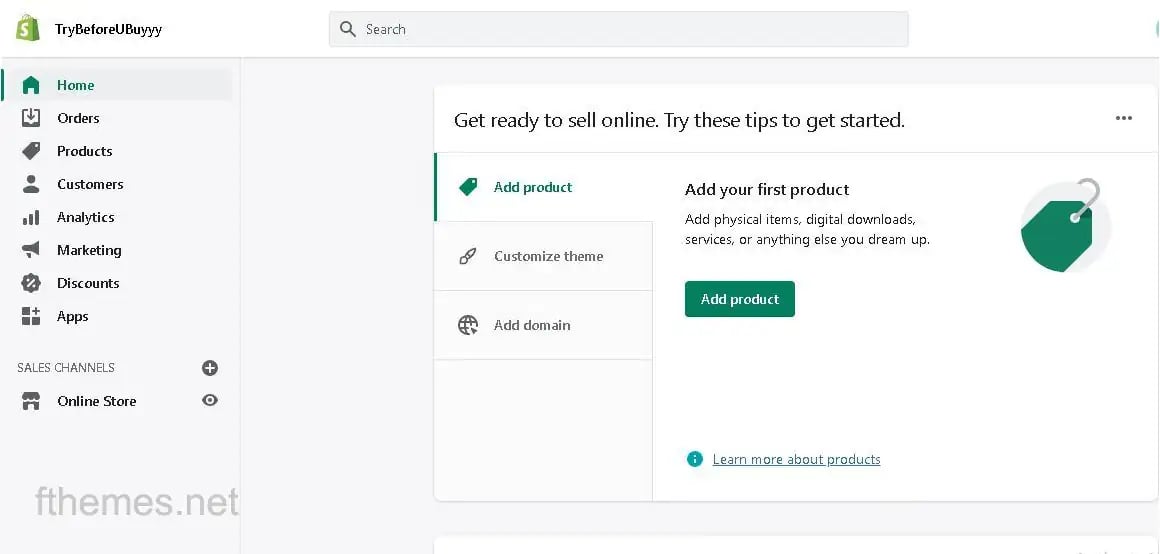
#Step 2: Once you get logged into your store’s Admin Dashboard, you will find the option “Add Product” on the home screen as you can see in the below image.
You can also add a product by clicking the option Products on the left-hand side navigation bar.
#Step 3: Once you have selected the Product option, you will get a new window just like the image below.
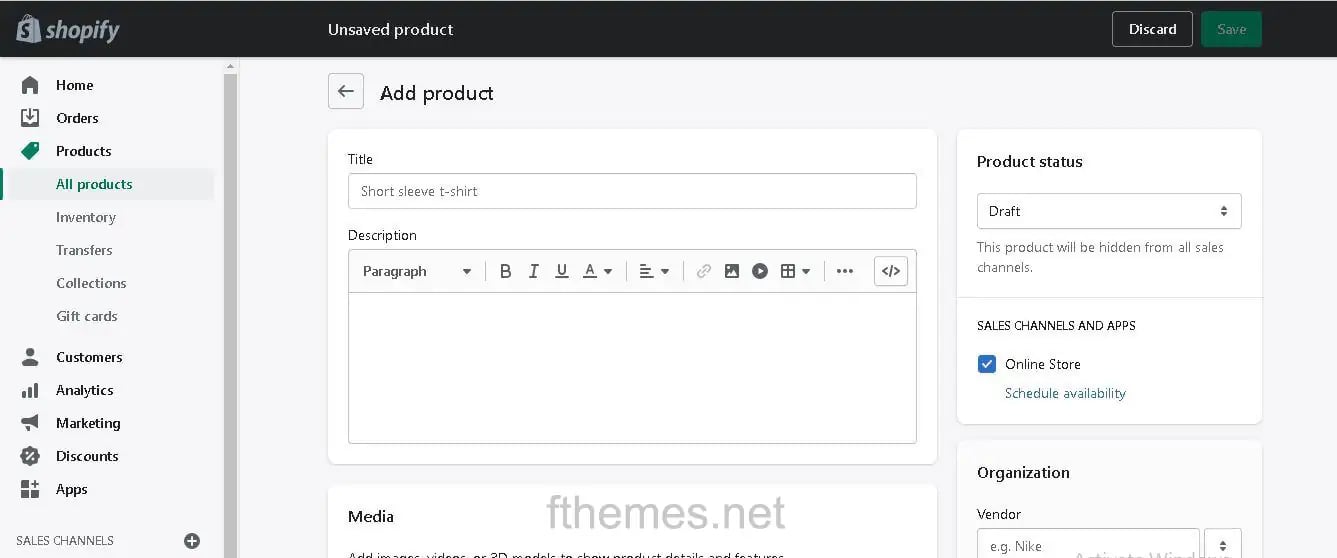
Here you have to enter the following details about the product you are selling or the service you are providing.
1. Title section
Here you have to provide the title or the name of your product. If you have an eCommerce store selling men's wear then it could be “T-Shirt or T-Shirt for Men”. You must remember that here the title should be short and concise. It must be meaningful so that your customer understands what product it is.
2. Description Section
Here you have to describe your product. As we are adding details about T-shirts as products, we are going to add different sizes, color availability, types of cloth and other attributes. Here you have a chance to capture your customer’s attention by providing them details about your product.
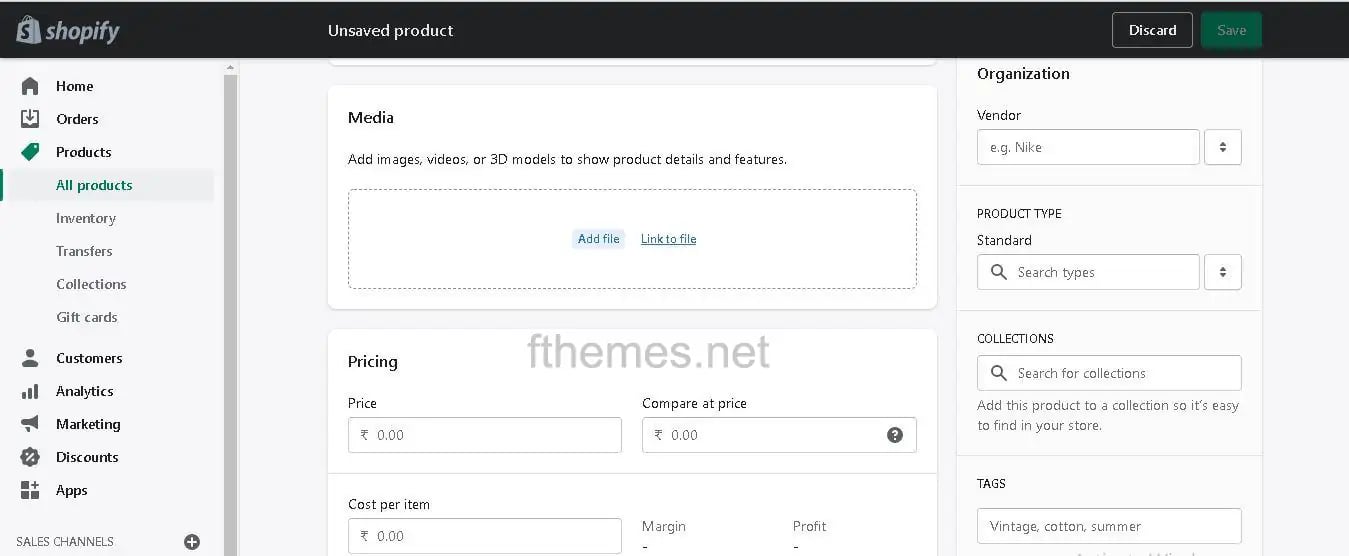
3. Media Section
In this section, you can upload photos of your product. Make sure they are of good quality. These images will play a vital role in your product details. The images should be captured from different angles so that customers can get to know how their product is going to look after buying it. If your product has different options like color, size, pattern then your images should be taken accordingly to showcase the features.
4. Price tag Section
Here you have to provide two prices. One is Price or the selling price which gets showcased on the Product page. And the other one is Compare at the price which gets showcased when you put your product into the Sale. You can also provide the Tax percentage here by clicking on the check box about Charge Tax.
5. Inventory Section
In this section, you can provide the SKU of your product. SKU is a Stock Keeping Unit that is used for keeping a record of your stock. If you are selling products with variants like different sizes, different colors, the different patterns then you must use a unique SKU for each product. That way you can track the level of your stock internally.
After the SKU you can provide the BAR code of each product for tracking purposes. Just below the SKU and Barcode, you will find the Quantity section where you can provide the available product quantity. There is an option for showing or hiding the product from the store when it runs out of stock.
6. Shipping Section
In this section, you have to select the checkbox if you are selling the physical product. If your service offers online products like Software, mobile apps, or any digital product then you don't need to select the box and can skip this part.
But if you are selling the physical product just like here in this example we are selling the Tshirt, we will have to provide the details like Weight of the product, Manufacturing region of the product, etc.
Above listed details are mandatory. These details will be present on the Product Details page of your website. Make sure they are genuine, true, and of rich quality so that customers will be convinced to buy the product.
Apart from these details, there are some other details you must provide on this Add Product page so that it will help your SEO to boost your website higher on the search engine result page (SERP).
7. Other Details
If you have noticed while entering the details, there are some sections we haven't discussed yet. Scroll the page to the top and at your right hand side, you will find the Product Status dropdown. It will identify to Shopify whether the product is Active or kept it in the Draft. Here if you have entered all details correctly and want to show a product in your website, you must select the Active option.
Just below this, you will find another section labeled as SALES CHANNELS AND APPS Section, Here you can select multiple options for where you want to sell your product. By default, it is selected as an Online Store but you can add social media channels like Facebook, Instagram, etc.
After this, there is a section called Organization. Here you have to provide the vendor details. Vendor details simply mean if you have created the product you are selling then you can put your name but if you are selling products from different manufacturers then you have to provide their name.
After entering all the details we have discussed, just click on the Save button and it will save your product. After saving the product just head toward the Product menu from the Dashboard and you will find your added product here just like in the image given below.

Click on this product and it will redirect you to the Edit page where you can make modifications if needed.
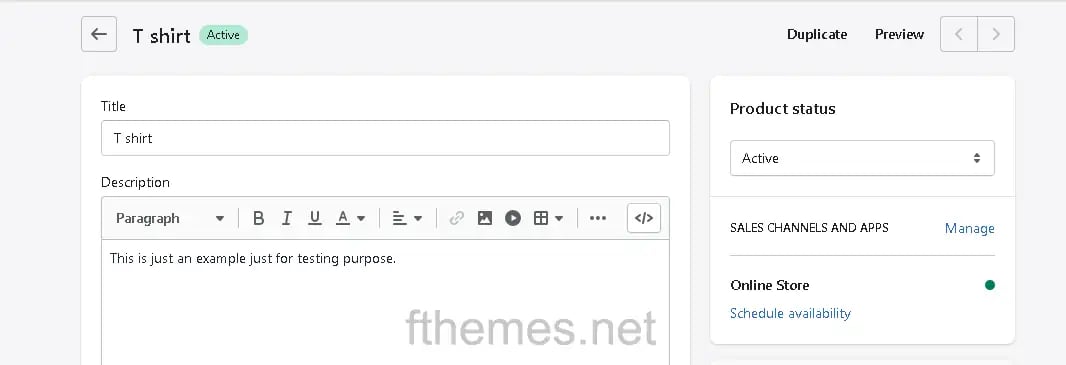
Click on the Preview button and you will get redirected to the Product Detail page where your product will get featured on your store, just like the image below.
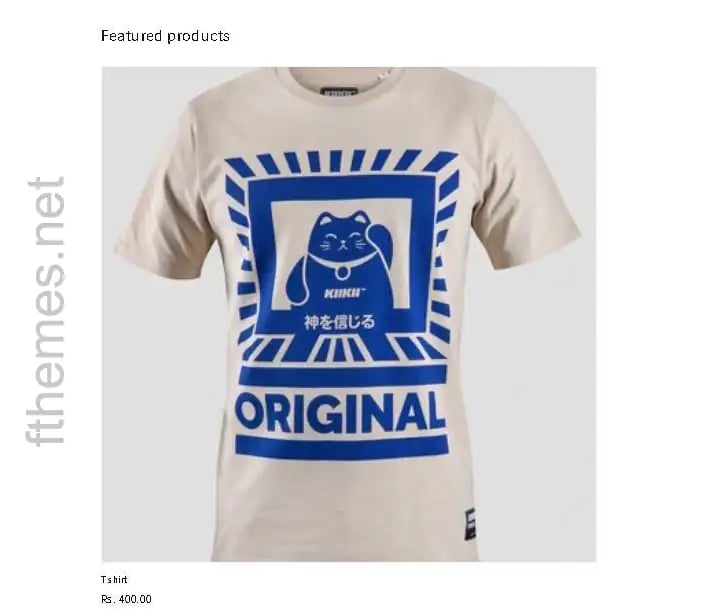
Ultimately adding products to your Shopify store is not that hard. If you follow this guide step by step you will understand the process and will be able to handle your shopify store in no time.
We hope that we were able to provide you with some useful advice and tips that will help you add products to your store. With the information provided in this guide, you should be able to add your first product without too much trouble.
Feel free to let us know in the comments section below if you face any issues. We are here to guide you and resolve your problems.
You can also reach out to us for troubleshooting any particular issue you’re facing.
TAGS
ShopifyThis blog provides a step-by-step guideline to help you change the store name of your Shopify website correctly and easily.
Gif comprises multiple images at once and creates a kind of video without sound. This post is a step-by-step tutorial to create animated GIF in...
Check out this step-by-step guide on how to change your business name on Facebook page.
Leave A Reply